|
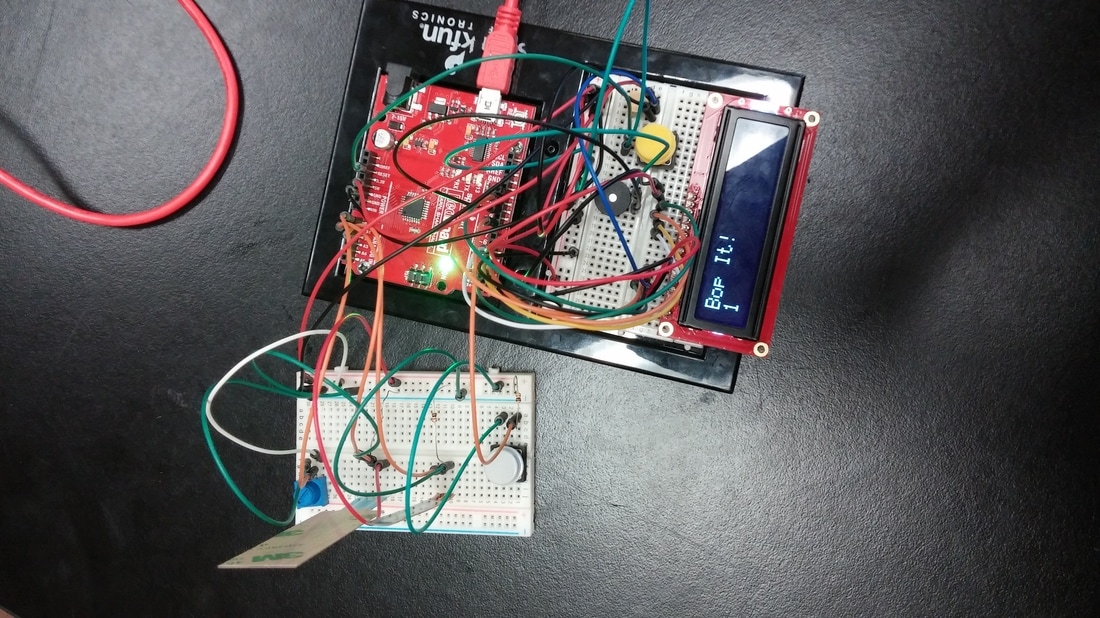
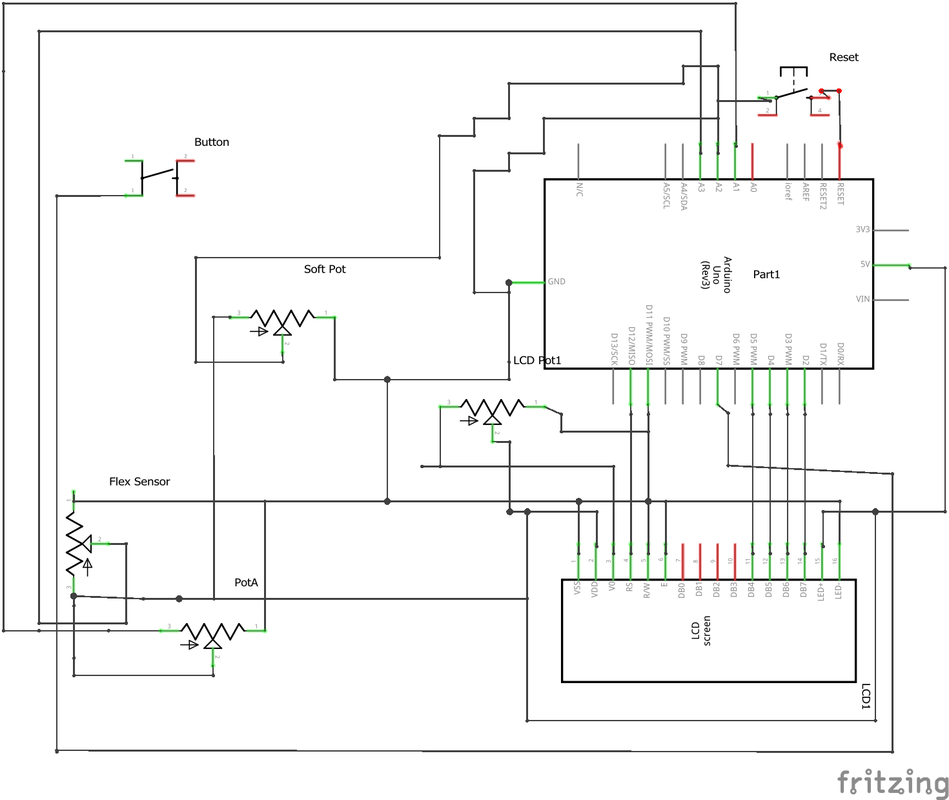
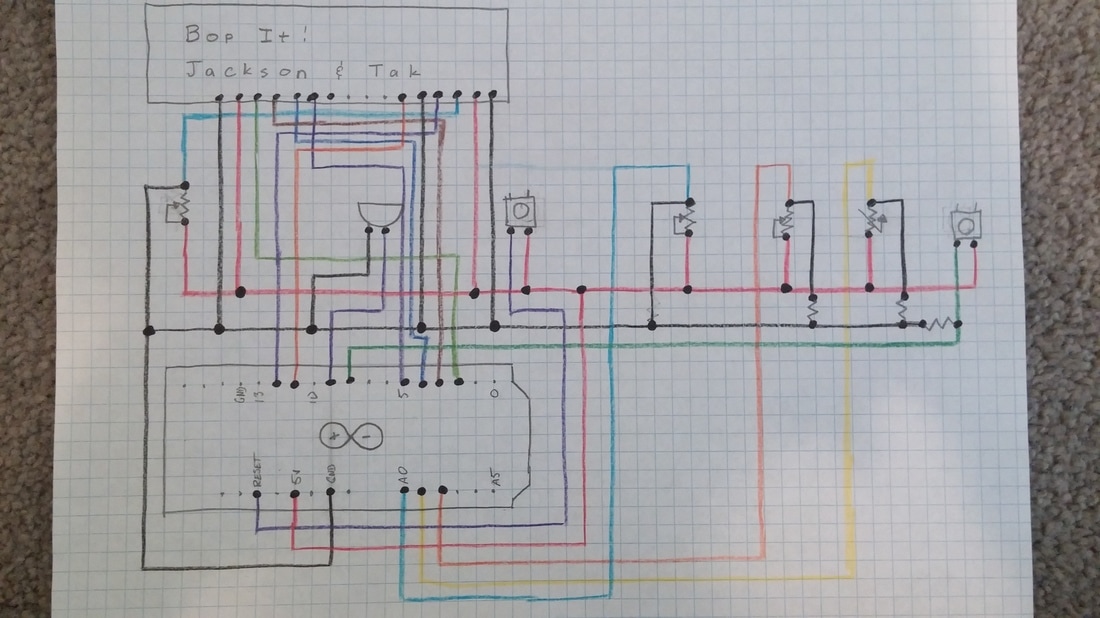
BOP IT!With an Arduino ComputerOur task was to make something cool using the Arduino boards and coding language. The result was to have a game where you would respond to a prompt on an LCD screen by activating one of the peripherals on the board. With a few more bells and whistles, this was the result.
|
|
BOP IT!
Code |
Electronics were a topic that was not covered in any curriculum beforehand in great detail, so this unit was a great introduction to the world of electricity. The idea was to learn with your partner at your own pace. We were given several packets of experiments to do, and were told to figure it out. After doing doing doing dozens of tests with batteries, switches, wires, and voltmeters, we had an in depth knowledge of circuits, pathways, and other concepts. We then moved on to the breadboard, and constructed a light that would blink at a rate set with a potentiometer by way of a timer. Completing this , we reached the third section of experiments, involving a tiny Arduino computer. Loosely following an instruction booklet, we taught ourselves not only how to wire ever more complicated circuits, but also how to code in Arduino ( A C based language). Having finished all of the requisite experiments, we were given the final assignment in this project : "Build Something Cool"
Circuits
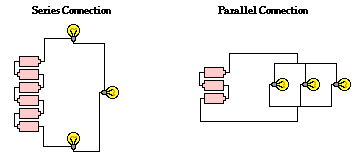
A circuit is functionally defined as "A loop of conductive material from one terminal of a power source to the other." All of the components in that definition are important, providing us with a good reference point on which to make predictions. Components in a circuit can be in series or in parallel with each other. In series, they are directly connected. In a parallel, the wires diverge and then meet up at the end of the network
Current
Current is defined as the "flow of charge or electricity through a circuit." This means how many electrons are moving how fast. This is represented with the variable 'I', and with the unit Amperes (A). DC, or direct current, only flows one way. However, AC, or alternating current, alternates. This pattern makes it easy to transmit over long distances, as transformers can step up the voltage to reduce current and minimize loss, then step it down at it's destination. This is why wall outlets are most commonly AC. (Although some high voltage DC systems are being tested). Our electronics, however, need DC, so an adapter converts the AC to DC for safe use. Current is constant in series, and splits off in proportion to resistance in each parallel branch. (3x more resistance, 3x less current.)
Resistance
Resistance is "the quantity of slowing down done by an obstacle to current." This means that resistance is inversely proportional to current, verified using Ohm's Law. This law states that Voltage equals Resistance times the Current. If the voltage is constant, and resistance increases, than current must decrease for this to hold true. Resistance is the variable r, and is measured in Ohms, or Ω. One can increase resistance, among other methods, by adding a resistor.
Voltage
Voltage is the "potential energy difference across a component in a circuit. " This is similar to regular potential energy, with a component being a drop, and the voltage a measure of that drop. Voltage is measured in volts, with the symbol being v. This completes Ohm's Law, making it V=ir.
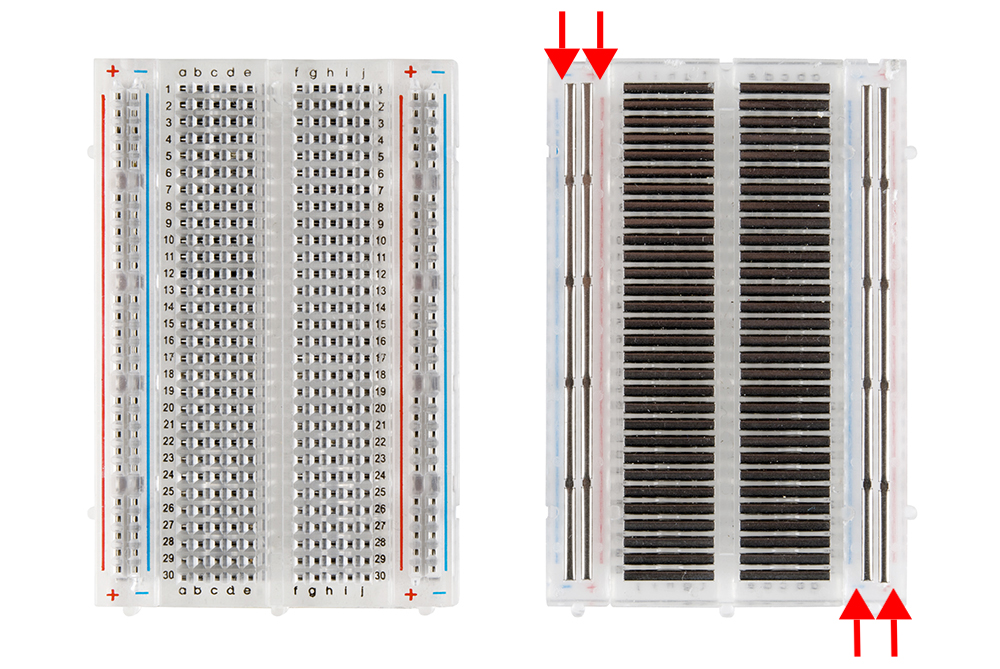
This a diagram of what a breadboard is, and how it works. A breadboard is essentially a device to hold electrical components and wires, without the need for clips of solder. Wires of pins are placed in the holes pictured above, and touch the corresponding metal rails beneath. The 4 long vertical rails are the power rails, where positive and negative charges can be placed. The main middle section consists typically of sets of five pins in two columns. The columns are not connected.
By setting up complex circuits, it is possible to do many things, such as making a light blink. However, instead of using a timer component and a large amount of time wiring the network, it is possible to achieve the same result with a simple circuit, an Arduino, and a few lines of code. Arduino is a C based language, and it enables us to digitally achieve many of the things we were not able to do before. We experimented with LCD screen, as well as servos, motors, and different potentiometers. The coding itself was fairly self explanatory, with only a few small details that need to be kept in mind.
Reflection
This project was only one of the few done this year that was not done in groups of 4 or 3. Instead, in order to maximize the amount of hands on experience that everybody needed to get, we worked in pairs. I was extremely fortunate to get a partner who was easy to work with, therefore maximizing the productivity of our team. We were able to work productively to finish the packets weeks ahead of schedule, allotting us plenty of time to work on our actual project. Once actually on the project, we brainstormed many ideas before coming up with Bop It. Both our inginutty and productivity were necessary for seeing this project come to fruition.
It is possible to find some small issues, however. Due to our advanced timeline, we were given a "contract" from the football program to build a 40-Meter Dash Timer, which can be read about on the Do It Better Project. Time working on the timer, however, was time not spent on the game. When we set the game up for presentations, we found there were a few bugs that we did not know exist. Although they were quickly ironed out, it was a bit close. We should have set it up a bit earilier in order to make sure everything worked.
Another improvement to be made would be to try and find a way to incorporate music during the game. This is problematic, because the Ardunio can only handle on set of instructions at a time. Possible ways to get around this would be to use two wireless communicating Arudinos, or something of the like.
Overall, this project has been one of the most productive and successful thruought my freshman career.
